Life as a Teacher

It’s hard to know where to start when life has taken such a turn in the last few months. Things have been busy, exciting, stressful, confusing, amazing

Since the beginning of the school year, my life has changed from Kayla the photographer/student to Miss Onufreychuk the physed teacher, photography teacher, yearbook leader, SRC representative, volleyball coach and busy-than-ever photographer.

Still all the while maintaining puppy cuddles with my dog and keeping Dylan and I a happy home together!

All of these things that someday you know will come, but you never really know when or how hard it will hit you. And for me, that time is now- and I couldn’t be more happy about it!

I always knew that I would forever be in love with being a teacher, but this year has really shown me how many more great things there are in this profession. Walking down the hallway in such an amazing place has shown me the value of a small community in a different way than I’ve seen it before. Our school is a family and our staff is too. Everyday there is something great to smile about when being in our building for each and every person in it.

This thing I call a job has been so rewarding in ways that I never knew existed. I LOVE seeing the creativity my students have as they pick up a camera for the first time. I LOVE seeing the progress our volleyball team has made from the beginning of the year until now. I LOVE watching students try out new games and activities in the gym as I teach them the importance of change and goal setting. I LOVE seeing our SRC plan meaningful events for our school and community. I LOVE watching our yearbook come together and collaborating with some very creative students. I LOVE walking into the staff room and seeing our little staff we call family.

I LOVE what I get to do everyday.

I’ve learned to make changes and adjust the way I do things in both school and life, but I’ve grown in so many ways in just a short 3 months. Life is busy, but it’s a good busy, and I wouldn’t change a thing!

So for now, this is my update. There’ll be more to come (I hope soon)
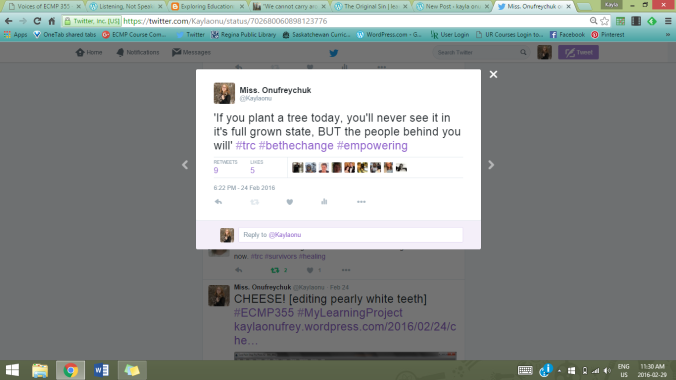
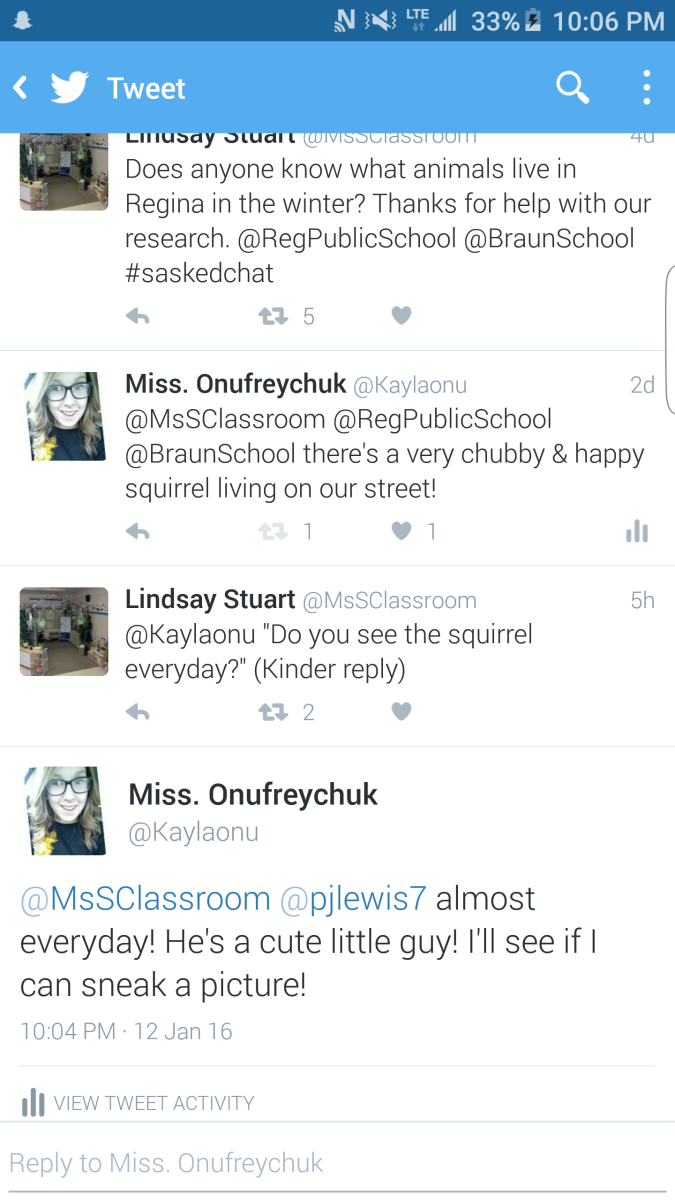
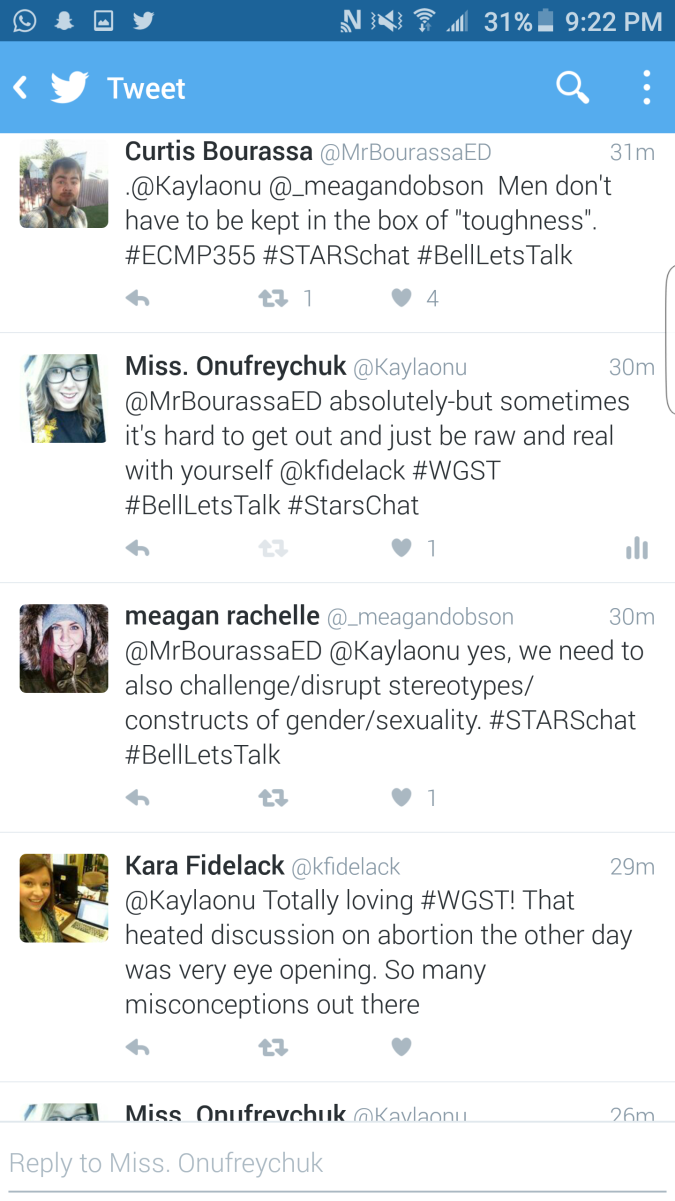
Keep up with my Twitter where I share daily things going on in my room and in our school!

This slideshow requires JavaScript.

Structures & Materials [GRADE 3 SCIENCE]

Back in internship I had the chance of working through a unit I created for the grade 3’s dealing with structures & materials! Check out this unit, complete with test that follows Pearson’s science textbook!

SCI 3 Structures I Can Statements

Science3TestStructuresMaterials

Science3TestStructuresMaterials2

Structures and Materials Booklet

Life UPDATE!

It’s hard to believe it’s been almost THREE months since my last post! But, in 3 months, a LOT has happened!

–> Convocated with my BeD Degree
–> Spent a nice 2 months as a substitute teacher in a variety of schools and LOVED it. I      got a chance to work with so many new and exciting faces and had a ton of fun!
–> Was involved in a very busy grad season and had a blast being back in Ituna school capturing some of this years’ graduates.
–> Had the chance to tag along with my grade 6’s on a fun
–> Got the GREAT news that I had been offered a continuing contract back in ITUNA for the fall and I am SO excited. It’s going to be so much fun being back there and doing what I love.

Since all of these crazy exciting things have been going on, I’ve also spent a ton of time at the lake, capturing weddings, volunteering for upcoming town events and RELAXING before a summer full of planning, editing and hanging out with some cute kids!

I’m so super excited for the rest of the summer and all that I have to look forward to in the fall! I’m so blessed! 


Interacting With You All!

It’s so weird that this is my last official post for ECMP355! To go along with my learning project and my summary of learning, I have put together a little explanation of the ways I’ve learned throughout this course. To go along with this, I have created a document to showcase some of my favorite moments from the course, and have screen-captured multiple examples of ways that I have both learned and interacted with others.

On Twitter, I learned to do so much more than send a tweet! I learned that a retweet can go a LONG way, that quoting something you see to share it with your followers is a great way to get a message across, I learned that Twitter Chats are amazing! I found that quite often I would help others by sharing a tweet, answering a question, or sharing resources. I LOVED this and I think it is one of the best parts about Twitter! It sure was exciting having my own tweets mentioned, retweeted or liked!

Screenshot (47)Screenshot_2016-01-12-22-06-03Screenshot_2016-01-27-21-22-01Screenshot_2016-02-01-21-51-39 1Screenshot_2016-03-09-21-00-27

When it came to interacting with others outside of twitter, I really felt that our go to site was helpful to link everyone’s posts in one place. I had no real ‘go to’ sites that I would choose, since everyone always had something super interesting to say! Weekly, I would check out our site and scan through post titles that caught my eye and open multiple tabs to read. I LOVED reading my peers writing and following their learning projects too! We all know I had a minor malfunction when it came to notifications of comments, but aside from me not knowing I was being replied to,  I think I was able to participate in some really good conversations on some super good posts.

Screenshot (54)Screenshot (52)

Lastly, our course community was a great place to post for answers to questions or share posts of our own! Although not everyone used it, I still enjoyed interacting when I could help, and seeing how this tool could be used.

In the end, the things I’ve learned has opened my mind to tech in the classroom in a whole new way. There is so much to do, learn and interacting with people on the internet is such a beneficial way to collaborating and making edtech work for you! I really did love participating in chats, talking with others and collaborating, you all are great and I hope to keep interacting the way I have over the last four months!

So, here it is.. Check out my collection of interactions over ECMP355! 


Drawing My Journey

It’s so hard to believe that this semester with ECMP355 is coming to and end! It’s been a whirlwind of resources, apps, websites, tweets, interactions & learning. There were some roadblocks and some times I really could see myself engaging in things I’ve never seen or used before. We had a TON of fun through our online lectures and I’ve engaged in some important conversations as a professional with peers in the class as well. I’m happy to say that it’s been a successful semester of learning all things tech & there are a ton of valuable things I’ll have with me as I go off into my journey as a teacher!

Check out my final project through my ‘draw my life’ project! I had so much fun creating it!


Learning by Doing

As I wrap up my final #LearningProject for ECMP355  I’ve come to realize just how much I’ve taken away from this journey!

When I first decided to take the chance to use my learning project as an opportunity to get to know my editing program, I was a bit concerned about what I would learn, and how I would do it. After using Corel Paint Shop Pro x2 for awhile, I wasn’t sure of how comfortable I would be making the switch to such an advanced editing program. I looked through my very first post and saw the chart describing what the limitations were on the old program, and what possibilities I had with the new one. It was all so much to take in.

My first step was taking the chance to learning this new program that I had sitting on my desktop for over 3 months, and getting my money’s worth out of what I had purchased. It was honestly just so much easier to use the old program, and do what I’ve always known. The basics. I got rolling, always resorting back to the old program when in need, and found some really great ways to learn. YouTube was my bff throughout this project, and Corel Discovery Center taught me a lot through their tutorials in simple step-by-step videos.

From there, I started with the basics and ended up finding new and exciting things to do with my project from just simple videos that linked me to more videos by more amazing people, such as Chris O’neil through his YouTube page. 

As I was learning, my peers LOVED what I was doing, and I received a lot of positive feedback. It made me realize how important what I was doing for my business was and how beneficial this project really was to me.

Throughout it all, I did face challenges knowing how long some things took me to learn both time-wise, and editing processing speed. I faced issues knowing which direction to go in next, since there were so many things I wanted to try out. I struggled with Screencastify and my old software on my computer, but eventually figured out ways to make a few engaging videos to show you my processes. I also faced problems with oversharing or undersharing my process in editing, but came to find balance in how much to show and when!

In the end, I realized that what I chose to work on over the last 3 months was something that was important for me to do, and that’s why it worked so well for me through my learning project. I’m happy to say that this project was a success regardless of the barriers I faced. I know that without this opportunity, I could still be using my old, limited program and NOT doing super cool things to my images. I really do hope to continue posting some of my progress through the program, and it is something that has opened my eyes up to a whole other aspect of photography and software editing.

I can’t wait to see what more I can learn! 

This slideshow requires JavaScript.

A Legacy-Not by Choice

I’ve been aware of the whole Amanda Todd crisis since the day it happened. I remember being in complete and total shock after hearing of her death, because I was one of the thousands of people that watched her
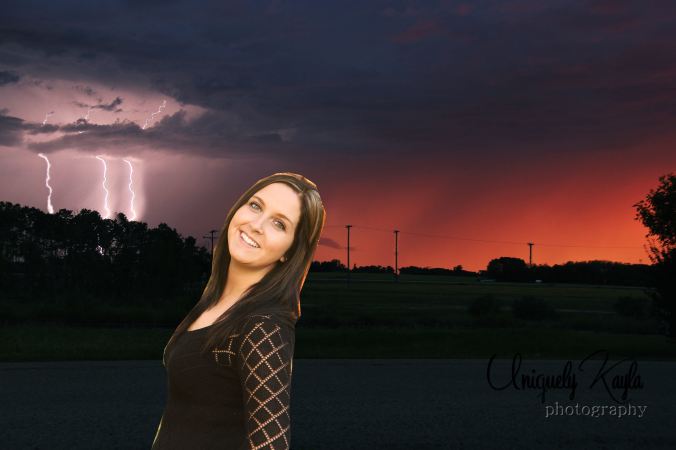
 original video that she posted in desperation of someone to help save her. What happened from that day and in that video is changing the world, and is helping shape people and young girls into who they are online and through their digital identity.

I was beyond excited when we had the opportunity to have Carol Todd talk to our class about her daughter’s story, and the implications it is having today on young children online. Her words were powerful and listening to her was so inspirational.

Among all of the important things that Carol talked about, some things that stood out to me were…

It is OUR responsibility to teach the generations coming up the importance of online safety and digital identity. Carol talked about the idea of ‘handing over the keys’ to a car that our child has never ever driven, and letting them go. This analogy stood out to me because it really is so simple to understand. NEVER would we give our young teen a car and tell them to go figure out how to drive. Think about the safety around this situation, they could get hurt, they could hurt someone else, their life could be forever changed….So why is using the internet or social media any different??

This stood out to me so much, that I checked out a link that was provided that talked about this situation.  The analogies that Carol talked about went right along side of this great article and explained how simple this idea of ‘handing it over’ really is. As a teacher and someone who will someday have children that will fall into this reality, I realize how important it is in my own role to ensure that I am educated about this issue, and that I can do a good job at educating young girls and boys about this. If not, it really is just as true to letting a student pick up a cellphone or use a computer and be thrown into the world of danger, threats and life-changing scenarios, just as Amanda Todd did.

With this being said, we need to be able to relate to these young children from an early age in ways that make sense to them. Carol talked about the idea of taking your friends photo, and posting it in a grocery store bulletin board. We wouldn’t do this would we? Then why is it so simple to do it online and feel okay about it? These are things that we need to show our students and children, and make it real to them. We need to make sure that they not only are aware that there is danger, but be shown what it looks like, and how do be safe around it.

Q83djYjnd6UEm5tA0swK0AjPBUugZRz9Cmcb2ag0mnw,rcJIWXoDDQYP0kIP9t6vOjSdyMD0WeN0jr-01WWN9bk

Lastly, hearing Carol’s words about her daughter & the snowflakes opened my eyes to a whole lot of inspiration surrounding this topic. Often when discussing these things, or a case in which ended so tragically, it is hard to find the courage and confidence to move forward in a positive light. The snowflake story that is related to Amanda and her life is both an inspiration and a push for future change. It was talked about by Carol and tweeted pefectly by Sarah…

“We are all snowflakes. But, unique and stronger together”.

If we can take what we have learned from Carol about her daughter and her story, and think about what we already know about digital identity and online safety, it really does look good for the kids of our future. But, we know that there is always going to be a mistake made, and that is okay, if we have the supports in place to protect that individual. So, just like the snowflakes, we need to support each other in all things internet safety, digital identity and educating ourselves and our children about this topic.  We sadly can never get back the days where Amanda was able to shine in this world, but we can make sure that her legacy and story is told to students to show them how strong we all can be.

Black & White.

It’s so crazy to think that my ‘formal’ learning project is almost coming to an end. I still have so much to learn and a lot more that I know I can do with my program! I wanted to end with something that has been coming up A LOT in the past, and something that will be really beneficial to me in my future editing. 

Black and white photography is a thing of the past, but is still something that can be done in post-processing an image. Honestly, a lot of people still prefer  b&w and there are so many different wants to do it, and accomplish a nice b&w. 

Like anything, there are multiple ways to achieve this in editing, and there are so many different looks to doing so. After a lot of research and different techniques, I found a few ways to get a look on an image. The Corel Learning Center was my BFF in this section!

Here’s two of the original photos that I worked with in raw colour before editing.
IMG_9368

IMG_2085

I like to work with some of my wedding shots in B&W- I find it to be more elegant! 

1. Filters.
Well, not like an instagram filter, a little more complicated then that, but there are pre-set filters built into the program that took some searching to find. With each filter that was pre-made in the program, I was able to modify any of the brightness/contrast/fill light/white balance. This made them a bit to customization, but pretty basic and pre-set. I found a lot of helpful info here at this article, rather than a tutorial.

b&w EXAMPLE.jpg

Here is what the ‘preset’ filters screen looks like. On the right, there are a TON of filters to choose from, and on the left, ways of changing/modifying that specific filter.

Here are some of the filters I applied to the above two images…

From this, I also found a “time machine” box in the program. This is a bit of a different filter, but had some really neat effects!
tIME MACHINE.jpg

2. Hue.
This is simple, but often overlooked. This simply just ‘removes’ colour from an image. Pretty simple, but precise steps need to be followed..                     Image>Hue/Saturation>Colourize>Change %’s = B&W Image.

HUE SAT EX.jpg

HUE SAT EX2

Here  I can choose the amount of hue/saturation that I would like. It ranges from a red tone-darker blues and then black/grey

HUESAT EX 3

I found that I liked this a lot better than pre-set filters, even though it is more work, the final product looked better

From this, I wanted to work more with adjusting curves, hue/sat., and brightness, so I found this awesome tutorial that I’ve been working with to see what I can do!

3. B&W and Colour
This is something that is SO neat to know how to do, and is something that I have played around with in the past. It is pretty simple, but can be done to SO many photos. It’s a pretty simple process that goes something like this..

-Duplicate image (so we have a background layer to work with)
-Select whatever black and white filter you’d like to the entire image
-Once selected, choose the ‘eraser’ tool, and erase any black and white areas you’d like, this leaves you with just the coloured areas you want showing!

I learned a lot of this over at a really good tutorial from a new channel I came across! Check it out here!

BW AND COLOUR EX]

This was the process of ‘erasing’ the b&w colouring to reveal colour underneath it. This is also why a duplicate background is so important, otherwise the entire image would be erased.

BW AND COLOUR FINAL

Ta-Da! Looks super cute! I would love to try this with some Rider Green football shots!

As I start to wrap up this project, I am thinking about ways I can mix all of my learning into one! If you have any ideas or suggestions, I’d love to hear them! For now, I’ll keep playing around with all of the new techniques I’ve learned on B&W!

WHY coding..WHY!?

When we use the internet, our computer or our cellphone, we all know that there is more to it than what is on the surface of the screen, but who really knows what. Well, that is where I’ve been introduced to the magic of code…what!?

Well, from what I’ve learned, code is the building blocks of our technology.

So, it brought me to thinking about WHY this is important, and why we need to know it. So I tried it out for myself on a coding site that is great for kids to learn the basics. This Frozen one is both appealing to kids and teaches them the basics. Here’s some examples…

code

This is great for teaching angles! It goes further than just the basics of coding, but also covers additional math related topics.

1code2

So, after all of this coding that is made into fun games for kids, I got thinking about why this is important. It seems like all of the new things I’ve been learning and adding to my EdTechToolbox have been super useful and I can definitely see myself using them in the classroom. But, honestly in this case, I wasn’t convinced. So, I did a Google Search to see what I could find. WHY is this something I should teach my kids…

I found a simple article from a site in the UK talking about the importance of code & why kids essentially will need it in the future. I wasn’t convinced.

I did some reading to see what my peers are thinking & Sarah does an awesome job at explaining how it works and her thoughts on it. I’d highly recommend checking out some of her videos over on her blog. So, upon further research, here’s what I’ve gathered…

  1. Coding is great for future careers. But, I’m still not convinced that a Kinder needs to learn how to code.I understand that coding is something that takes time, and like anything, if learned early- it’s easier.
  2. We need to adjust/adapt for the futureThis means that we need to not only take this tech and use it, but understand it and teach our kids to understand it.
  3. It teaches logical thinking. This, I can get on board with. After reading this article about why kids NEED to code, I was a little more convinced of the benefits of code. In addition, after spending time actually doing the activities on the coding site, the educators tab helped me start to wrap my brain around this whole idea. Check it out here.

In the end, I’m still not ready to jump onto the coding wagon and start integrating it into the curriculum and everyday learning….yet. Like anything, it takes time to adjust and adapt as a teacher before we can make the changes for our students. I’ve been pretty lucky to be introduced to so many great resources over the last little while and always keeping in mind that they may or may not work is something to think about. In this case, maybe it’s not for me. But I did try, and I know that I probably will try again in the future.

Are you ready for the coding world?? Maybe I should take these 3 Steps to Becoming a Coding Teacher…

Time Travel..editing?

So, things have been CRAZY with all the editing going on in the last week or so! Not only have I been working on my learning project & finding new things to do with my program, but I have also been working on a TON of client editing, which has helped me navigate through the program a lot as well!

Things that I’ve noticed…
-I am getting faster at navigating the new program and am getting used to using in more over the old program.
-Tools sometimes take a little longer to use, since they’re of a higher quality over the old one.
– I am no longer needing to use the ‘help center’ on screen within the program.
-Client editing has become more clean and I am able to do a precise job on touch ups.
-YouTube tutorials link to more YouTube tutorials.. it’s never-ending & exciting!

This round, I’ve been working a lot with the backgrounds of images and with raster layers on images. It’s a bit of a tricky subject and something that I’ve honestly never worked with. The video I came across from Corel Discovery Center really got me interested in the idea of background removal/creation, so the tutorial I started with was super helpful and simple. This process is different than a lot of the other things I’ve worked on, because there isn’t just one tool that does the job for you, rather multiple tools and steps that need to be worked on in a specific order.

The way it works is basically taking an image (in my case a person or dog) and using the selection tools to choose the section of the image you’d like to use/select. In the new program, there are multiple ways of doing this (feather selector, freehand selector, select-all selector, etc.). This took some practice to be able to select the part of the image I wanted.

CUTOURRODI2.jpg
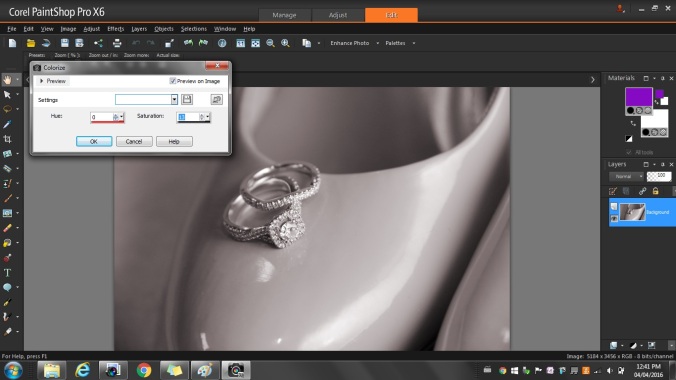
This process was the part that took the longest, and after complete I used the ‘invert’ and feather options. This made the edges of the image look a lot less harsh or like I just ‘cut them out’

From here, I was able to choose an image that I’d like to use as the background and do some re-sizing and moving to make it fit. This also took a bit of time and I wanted to make sure the colours fit. In this case, it wasn’t the best fit for colour, more of just to see how it worked..

Kendra in lightening.jpg

You can see that the edges were a bit rough, but it was my first attempt!

I thought I’d give it a try again, but this time used an image of me that had less of a background to deal with. It turns out the feathering & selecting was much easier since the background was soft, rather than colourful like the one of my sister..

KAYLACUTOUT

You can see the soft edges surrounding the cutout- feathering tool after selection

KAYLAIN HAWAII
Looks like my trip to a tropical destination was fun! So was editing this 🙂